Tuesday, December 6, 2011

Only My Favorite Salads Ever

As you can tell, the last couple weeks have been nuts.  My cooking sadly has taken the toll of that business too.  This week though chicken was on sale so I decided to buy some after not buying it for like a month and a half.  I was trying to finish all the other foods that I had bought previously before I bought anything else and the time had finally come.  I bought chicken tenders because they are much easier to cook and they are better for portion sizes.  Since I bought chicken tenders, I immediately thought salad but not just any salad.  I wanted to make one of my all-time favorite salads...barbeque chicken salad.  My inspriation for this salad comes from my favorite place to eat...Panera Bread.  For some reason I love Panera Bread and could literally eat every meal there.  You can ask my friends, if we're going out to eat Panera is always my first choice.  If you've never eaten there, you have to because it is o so good!  I love basically anything on the menu but my favorite salad to get there is the BBQ Chopped Chicken Salad.  This salad that I made is a spin off of it.  Here is what went into my BBQ chicken salad...

Marinade for chicken (this is all estimated because I didn't measure them accurately):
1/4 cup bbq sauce
1/8 cup honey mustard
1/2 tsp garlic powder

Salad: 
4 chicken tenders
1 1/2 cups Romaine lettuce
1/4 cup roasted southwest style corn, drained and rinsed
10 baby tomatoes, chopped
1/4 cucumber, chopped
1 Roma tomato, chopped
1/4 green bell pepper, chopped
1 packet light ranch dressing
Ground pepper to taste

First thing I did to re-create my salad was mix the marinade together.  I wanted to make a more honey bbq sauce so I decided to mix in the honey mustard with it.  I love garlic in anything so I added that too.  I then placed the chicken tenders in a plastic bag and poured the bbq sauce in the bag.  I let them marinade for about an hour.  After they marinated for an hour, I put them in an oven at 375 degrees for about 14 minutes.  This was the perfect amount of time for cooking.

Bbq sauce

While the chicken was cooking, I began to make my salad and roast the corn.  I had never tried this corn before but it sounded really good and the Panera salad has a corn blend in it but it is roasted.  I wanted my corn to be roasted too but I didn't know how to go about doing it.  So I decided to do a little trial and error.  I heated up a skillet pan to medium high heat and sprayed it with cooking oil.  I then added the corn to the pan and stirred it around for about 15 minutes and it worked!  It was perfectly roasted so I will definitely roast corn like this again. 

 Love me some bbq chicken

It worked, it worked!

While the corn was roasting too, I chopped the lettuce, cucumber, tomatoes, and green pepper and added them all to a salad bowl.  Once the chicken was done, I took it out of the oven and cut into it to make sure it was done.  Once I knew the chicken was fully cooked, I chopped it up and added it to the salad.  Once all the ingredients were in the bowl, I added the pepper and the ranch dressing and mixed it all together.  It was awesome!  It definitely hit the spot for my craving and I will definitely be making this again.  Next time I may try to add some tortilla strips to add a little more crunch but we'll see.  So if you like bbq chicken and you like salads, make this!

Finished product...almost as good as the real thing

Tuesday, November 29, 2011

Pizza in Bite Sized Form Yummy!

So last saturday was marathon day of football for my family and I.  Sadly we did not attend any college games that day but we sat and watched football all day from the comfort of our home.  As you can tell, my family loves college football.  Since we didn't get to make it to any of the games, we didn't want to miss out on the tailgate experience so we decided to have a mini tailgate at our house.  Since it was going to be a long day of football we decided on Low Country Boil for dinner...great decision.  Before the Low Country Boil though, me and my mom decided to make some finger foods for everyone to snack on all day.  My brothers asked for chips and Queso so my mom took care of that but I wanted to make something that I had seen on non other than Pinterest.  I had come across a recipe for Pizza Bites and they looked so good that I just had to try them sometime!  This turned out to be the perfect opportunity because my brothers will pretty much eat anything I serve them and they would tell me if they were bad so it was a win, win situation!  Here is what I used for my pizza bites...

1 can of pizza crust
3/4 block of Mozzarella cheese, cubed
1/2 bag of pepperoni minis
Italian seasoning
Grated Parmesan cheese
Olive oil

Just a few of the ingredients

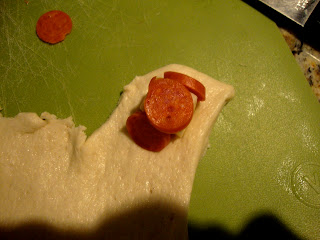
The original recipe calls for homemade pizza dough but we didn't really have the time or effort to make that so we just used the store bought kind and it worked just as well!  First things first, I preheated the oven to 400 degrees.  While that was heating up, I began to cut the cheese into small cubes.  You can honestly cut as big or as little cubes as you want so none of mine turned out to be the same size.  Some were really big and some were really small it just depends on how many you want to make.  I rolled out the pizza dough to make it flat.  I placed the cheese cube and about five pepperonis and then cut a cube around it so that the dough could be folded over the entire thing into a ball.  I then placed the pizza balls into 2 9-inch greased cake pans and arranged them to how they could fit.  Here is a little visual aid to help...

 Cutting the dough to mold around the ingredients

Cut piece of dough with filling

I will say that I did not use the same amount of pepperonis in each because they cheese cubes were different sizes.  I also didn't put any pepperonis in some of them because I personally am not a huge pepperoni fan and neither is my sister in law.  You can honestly put whatever ingredients inside them but I just chose these because I knew my brothers would like them and it was simple.  Once I had finished cutting up the entire pizza dough, I put the 2 cake pans in the oven.  One of the pans was completely full but the other only filled about a fourth of the pan.  I then brushed the tops of the bites will olive oil and sprinkled Italian seasoning and grated Parmesan cheese on top.  You don't have to use the Italian seasoning or cheese but it gave it a little more of a pizza taste.  Another other Italian type spice would work but since they are all combined in the Italian seasoning spice, it makes sense to just simplify it and use that.  I then set the timer for 20 minutes because that is what the original recipe called for.  When the timer went off, we checked them and only the small pan looked done.  We left the pan that was full in the oven and cooked them for another 2 minutes.  This was perfect because they turned out nice and brown on the top...

All done!

I let them cool for about 2 minutes but the brothers were hungry so I wanted to plate them up as soon as possible because the other ones that I had already taken out of the oven had cooled very quickly.  So being the smart woman that my mom is, we placed a plate on top of the pan, flipped it over, took another plate and placed it on top of the first plate, and flipped it over again so that all the pizza bites were perfectly on the plate.  The moment of truth had finally come to taste them and I got nothing but great reviews!  Everyone really enjoyed them and they were gone within 30 minutes...if that doesn't say they were good, then I don't know what would.  I tried a cheese one myself and I really like it too.  Next time I think I may make a marinara sauce to go with it just to give it a more pizza feel but my family told me they didn't want one when I made these.  I would definitely recommend these for a tailgate or appetizer for a party because they are very easy, quick, and delicious and definitely a crowd pleaser with my family!  Next time I want to try to put some veggies inside some of them like spinach or onions though because I love me some veggie pizza.  Hope y'all enjoyed the marathon day of college football like we did!

Saturday, November 26, 2011

Thanksgiving...Only One of My Favorite Holidays: Part 2

Thanksgiving means food and food means I bake or cook something plain and simple.  If you read my last post, then you already understand how much I love Thanksgiving but if you didn't go read it!  I made a side dish of brussels sprouts that were a hit but I had to bake something too because baking is what I truly love to do.  I searched for the perfect dessert to make and found it again in Cooking Light.  I decided upon a Triple Chocolate Cake because my mom was making an apple cake that she had gotten the recipe for from one of her friends.  This cake was kind of labor intensive but worth it in the end.  Here is what we used because my mom helped me out making it again...

Cake:
1 cup boiling water
1/2 cup + 1 tablespoon cocoa, divided
2 ounces bittersweet chocolate, finely chopped
cooking spray
1 1/2 cups granulated sugar
6 tablespoons unsalted butter, softened
1 teaspoon vanilla extract
3 large egg white
1/2 cups reduced-fat sour cream
2 cups cake flour
1 1/2 teaspoons baking powder
1/2 teaspoon baking soda
1/2 teaspoon salt

Filling:
1/3 cup skim milk
1 tablespoon granulated sugar
1 tablespoon cornstarch
Dash of salt
4 ounces milk chocolate chips
3/4 cup light whipped topping, thawed

Glaze:
1/2 cup powdered sugar
1/4 cup cocoa
3 tablespoons fat-free milk
2 teaspoons butter
1 ounce bittersweet chocolate, finely chopped

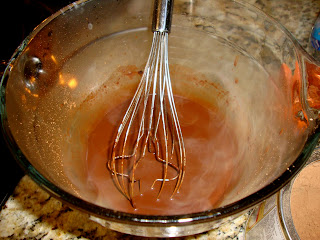
See now you understand why it was a little labor intensive haha.  We made the cakes and the filling the night before because we just went to my grandparents for the day and we knew we would not have the kitchen space to bake them up there.  First thing we did for the cakes was boil the water.  I chopped the bittersweet chocolate while the water was boiling and once boiled I added the water, cocoa, and chocolate together in a glass mixing bowl.  I used a whisk to stir them to make sure that there were no chunks in the mixture.  We then had to let it cool to room temperature before we could use it.

Hot off the stove...notice the steam

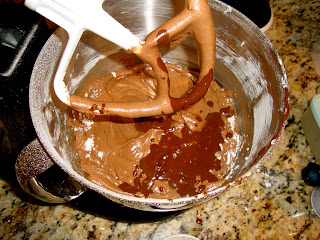
While the chocolate mixture was cooling, I then started on the other parts of the cake recipe.  First, I coated 2 (8-inch) cake pans with cooking spray, cut out wax paper to place in the pans, placed the wax paper in the pans, and then sprayed the pans with cooking spray again.  In an electric mixer, I combined the sugar, butter, and vanilla.  I beat this mixture on medium speed for about a minute.  The egg whites were then added one at a time and I beat the mixture after each egg white addition,  Sour cream was the next addition and then that was beat for about 2 minutes.  Meanwhile in another bowl, I combined the flour, baking powder, baking soda, and salt with a whisk.  Once the chocolate mixture was cooled to room temperature, I added the flour mixture and chocolate mixture alternately to the sugar mixture.  I started and ended with the flour mixture and beat it all together until combined.  

After adding the chocolate mixture

After everything was fully combined together, I poured the batter into the 2 cake pans evenly.  I then put them in the oven for 30 minutes at 350 degrees.  When the timer went off for 30 minutes, we took them out and checked to see if they were done but after the toothpick check, they appeared they were not.  So we put them back in the oven for 5 more minutes.  This sadly was too long because this is what made our cakes a little dry but I'll get to that later.

 Pre-baking

Post-baking

I was planning on making the filling the next morning since it didn't look too labor intensive so I left to go bowling with my friends.  My mom later decided that it would be better to make the filling that night so she went ahead and made it with my permission.  To make the filling me added the milk and next 3 ingredients in a saucepan over medium-low heat.  She then brought it to a boil while stirring it constantly.  Cook until think and then remove from the heat.  Then add the milk chocolate in and stir until smooth.  Pour it into a bowl and then cover and chill.  Here's what it looked like before I added the whipped topping to it the next day...

Adding the whipped topping in

The next day after I finished the filling, I began to assemble the cake.  I put one cake layer on the bottom of the cake carrier and then proceeded to add the filling.  I smoothed it as evenly as I could over the bottom cake and then plopped the other cake layer on top.  This made the filling kind of flow over the bottom layer so we just decided to spread it around the bottom layer.

Cakes with the filling

To make the glaze, I combined the powdered sugar and remaining ingredients in a saucepan over low heat.  I stirred frequently until fully combined.  I then poured it over the top of the cake as best as I could.  It didn't turn out as pretty as the picture in the magazine but it tasted good so that's all that matter right?

Finished product

We then put the cake in the fridge for a couple hours to let it set.  When dessert time rolled around, we took it out and cut into it.  Sadly it was not as good as I hoped but that's because we cooked the cakes too long.  The cakes were a little dry but the filling and glaze were delicious.  It was not the best thing I've made and I will be the first to admit it but everyone seemed to like it.  So if you make this, cook the cakes according to the cook time.  It would have been great if they weren't dry but sadly that was not the case this time.  I combined mine with some pumpkin pie and that was delicious because it didn't make it so dry.  I mean I would definitely recommend making this and I probably will try to make it again.  I may add chocolate chips to the cakes next time and make more filling to sort of ice the whole cake as well.  We definitely enjoyed our thanksgiving so I hope that y'all all did too!

Thanksgiving...Only One of My Favorite Holidays, Part 1

Nothing says fall or the holidays like Thanksgiving and as we all know we had it last Thursday.  Thanksgiving is one of my favorite holidays all year because it makes you realize how incredibly blessed we are and it's great to spend time with family and friends.  I also love the week long break from school that we get as well as the fact that it is socially acceptable to eat alllllll dayyyyy and no one says a word.  A day full of eating, who wouldn't like that holiday?  Since Thanksgiving is all about food, I of course offered to help by making something.  We went to my grandparents house as we always do and we wanted to help so my mom and I decided to make 2 vegetables and 2 desserts.  We love our veggies and desserts in this family...or at least I love the veggies and everyone else loves the desserts haha.  My mom and I had both been wanting to make brussels sprouts because we had come across several recipes for them that looked really good so we decided upon that and steamed green beans because that is a favorite among my family.  I was in charge of the brussel sprouts and my mom was in charge of the green beans.  The recipe that I chose for the brussels sprouts was from non other than Cooking Light.  The recipe I found was for sauteed brussels sprouts with bacon.  Here is what we ended up doing though because we changed the spices around a bit...

3 slices of bacon, chopped
1 1/2 fresh brussels sprouts, cleaned and halved
1 cup onion, sliced
3/4 cup fat-free, lower sodium chicken broth
1 tablespoon + dash garlic powder
Dash of salt and pepper

We used garlic instead of thyme because that is a more common spice and a lot of people like it better.  First thing we did was cook the bacon over medium high heat in a sprayed skillet.  It took around 10 minutes and my mom drained the pan so she could use the bacon grease for the green beans.  After the bacon was cooked, I chopped it into small pieces for sprinkling on top later.  While the bacon was cooking, I sliced the onion...

Sliced onions

Once the onions were sliced, I added them to the same pan we had cooked the bacon in along with the garlic.  My mom helped me out because she was in the kitchen cooking things too but we cooked the onions until they were browned.  I then added the chicken stock, brussels sprouts that we had washed, peeled, and cut in half, bacon, and salt and pepper.  We then brought it to a boil and covered it to simmer.

 Onions cooking away

After adding the brussels sprouts

We didn't have a cover for the frying pan so we used a pizza pan to cover it.  It took us around 20 minutes for the brussels sprouts to get tender but under ideal conditions it would probably take less.  You just have to simmer them until they are tender.  I tasted one while they were cooking and they tasted a little bland so I added more garlic powder, salt, and pepper.  The amount of spices you use really just depends on how much seasoning you like.  You can also use other spices but we just like garlic so that was the winner.  After the 20 minutes of simmering, they were ready to be plated.  Normally a lot of people don't like brussels sprouts but they were a hit!  Everyone loved them and they tasted delicious.  The bacon and onions really added a lot of flavoring and the amount of garlic was just right.  Now that I've finally made brussels sprouts, I will definitely be making them again.  I may try to make some with some sort of balsamic dressing or with some cheese next time but I guess it just depends on my mood that day.  I would definitely recommend this recipe if you like veggies and even if you don't think you'd like brussels sprouts, try this recipe because it may change your mind!

Tuesday, November 22, 2011

Woah I Love Pumpkin Flavored Things

I never knew how much I loved pumpkin flavored food until this fall and let me tell you, I am now obsessed.  They just remind me so much of fall and the holidays that it just brings out such a good feeling and flavor.  So in light of this love for pumpkin, I baked something else that incorporated it.  I was going to have dinner with a couple of my friends at a friends house so I offered to bring dessert because I found a recipe that looked so amazing, I just had to try it soon!  This was the perfect opportunity.  I found this recipe on Pinterest yet again and browsing that site is becoming a problem haha.  The recipe I found was for pumpkin caramel chocolate chip cookie bars.  As always, I tweaked it a little bit so here is what I used to make this delicious taste of fall...

Crust*:
2 1/4 cups all-purpose flour
2 cups quick-cooking oats
1 1/2 cups packed brown sugar
1 tsp baking soda
1/2 tsp salt
1/2 tsp pumpkin pie spice
1 cup butter, softened
1/2 cup pumpkin puree

*I had to make an additional half batch of the crust recipe because I didn't have enough to cover the inside but I think I used too much for the crust so you may not have to do that.

Filling:
1 jar (12.25 oz.) caramel topping (1 cup)
3 tbsp all-purpose flour
3/4 cup semisweet chocolate chips
1/4 cup butterscotch chips
1/2 cup white chocolate chips

First things first, preheat the oven to 350 degrees.  I sprayed a 13x9-inch baking pan with cooking spray to bake them in.  I then combined all of the ingredients for the crust in a large bowl with a mixer on low speed until well blended together.  The recipe says to reserve half of the mixture for the topping, which I thought I did but apparently not, and place the other half on the bottom of the greased pan.  I then put the crust in the oven for 10 minutes.  


Pre-mixing

Post-mixing

Bottom layer of the bars

While the crust was cooking, I started to work on the filling.  This is where I didn't read the recipe right because I was in a hurry...surprise right?  I was supposed to just combine the jar of caramel topping with 3 tablespoons of flour and blend them together but I also added all the chocolate chips to the mixture.  I thought I was supposed to add everything together but then when I read the recipe again, I realized that was definitely not the case haha.  

Caramel mixture for the filling...oops

After the crust had baked for 10 minutes, I took it out and began to spread the caramel mixture on top of it.  It wasn't spreading very well because it was so thick and in the original recipe you are supposed to drizzle the caramel on top of the chocolate chips.  This would work much better so when you make these bars, sprinkle all the chocolate chips on top of the crust and then drizzle the caramel over the chocolate chips.  This was also the time that I decided to add the white chocolate chips as well because you can never have too many chocolate chips and I had them.

Bars with filling poured on top

After I screwed up the filling (it ended up turning out good though so now worries), I tried to add the remaining crust to the top...I didn't have nearly enough.  This is when I decided to make a half batch of the crust recipe.  I whipped it up quickly and added it to the top and it barely covered the whole thing.  Next time I will definitely use less of the crust recipe on the bottom layer.  I then put the bars back in the oven for about 22 minutes to bake until they were golden brown.  They looked perfect when they came out of the oven and I let them cool as long as I could until I had to run out the door.

Pre 2nd baking

The recipe says to refrigerate them for about 1-2 hours and once I got to my friend's house, I put them in the refrigerator and let them cool for about an 1-2 hours.  After we finished dinner, I took them out and prepared to serve them.  They were a little difficult to cut because they were so cold but we used a sharp knife and got them out.  The bars were like eating fall...they were amazing.  I honestly couldn't stop eating them and everyone absolutely loved them!  We didn't finish them all so I took them home and shared them with my roommates and a couple other friends and got nothing but positive feedback back.  Next time I will definitely read the directions better and maybe add pretzels for a little crunch because I love me some crunch.  If you like pumpkin, I would definitely make these but honestly the pumpkin flavor was not overwhelming so if you're not a huge pumpkin fan, you will still love them.  They're a great fall treat so make them!

 Finished product

YUMMM

Geez it's all Gone?

In case you didn't read my previous post, I have been busy, busy, busy which is why I haven't been posting recently.  I'm alive and well I promise just busy with life.  I have still been cooking and baking though so now I'm finally catching up and telling y'all about what I've been up to.  In my previous post, I talked about how I made cake batter blondies because we were going to have a bunch of people over.  I didn't want to stop there though because when entertaining you have to make something savory and sweet.  I have always wanted to make spinach and artichoke dip so this was the perfect opportunity to do it.  I got the recipe from my recipes again because when all else fails, I go there to find a recipe.  The recipe is actually from Cooking Light which is also my go-to for recipes.  This recipe was very easy, delicious, and much healthier for you than regular spinach and artichoke dip and those are my 3 favorite descriptions of food when it comes to cooking an baking.  Here's what went into my spinach and artichoke dip...

2 cups (8 ounces) shredded part-skim mozzarella cheese
1/2 cup fat-free cour cream
1/4 cup (1 ounce) grated Parmesan cheese (original calls for fresh but I'm in college and on a budget to I used shake Parmesan cheese)
1/4 tsp black pepper
1/2 tbsp garlic
1 (12-ounce) can artichoke hearts, drained and chopped
1 (8 ounce) block 1/3 less-fat cream cheese
1 (8 ounce) bloack fat-free cream cheese
1 (10 ounce) package of frozen chopped spinach, thawed, drained, and squeezed dry

Here's something that I've learned these past couple months from cooking and just life in general...things always take longer than you expect.  With that being said, I thought that I would have plenty of time to make this dip before everyone came over that night but sadly that was not the case.  I had to leave to go to a meeting at like 5:30ish that night and I got home around 5:00 to start the dip...I was working like a mad woman to finish this thing.  I had just bought the cream cheese at thr grocery store so it wasn't exactly softened but you got to work with what you're given when on a time crunch.  I made a total mess of the kitchen but the end product was worth it and don't worry I finished it in time thank goodness!

First thing I did when I rushed in the door was preheat the oven to 350 degrees.  While the oven was heating up, I took out the frozen spinach from the package and ran it under water to help it thaw...it was not thawing very quickly.  So what do you do in a time when you literally have no time?  Throw it in the microwave and hope it doesn't ruin it.  I heated the spinach for about a minute and then I put it aside in another bowl.  I then tried to drain it as best as I could but I didn't have to to sit there for like 15 minutes draining it so I just did it as much as I thought it needed. 

 Doesn't that look appetizing haha

 I then drained and rinsed the artichoke hearts so that I could begin to chop them up.  I chopped the whole can up as quickly as possible and tried to chop them in as small of pieces as possible.  Here's my results...  


After frantically chopping the artichoke hearts, I then added 1 1/2 cups of mozzarella, the sour cream, 2 tablespoons of Parmesan, and the next 6 ingredients to the artichoke hearts and spinach in a large bowl.  I then stirred them all together until they were well blended.  
All mixed together

Once everything was evenly mixed together, I scooped the dip into a 1 1/2-quart baking dish.  I sprinkled the remaining 1/2 cup mozzarella and 2 more tablespoons of Parmesan to the dip and then put it in the oven.

Mmmm cheese

At this point, I had about 15 minutes until I had to leave.  I let it cook for 15 minutes and then turned off the oven and rushed out the door.  Once I came back from my meeting, I turned the oven back on while the dish was still in it.  I cooked it for about another 20 minutes and then took it out to cool and serve.  Once I put it out, everyone could not stop eating it and let me tell you I know why.  I was SO good!  I love spinach and artichoke dip and it tasted the same to me as any other I've tried but it is so much better for you.  Everyone loved it and by the time the last person left our house, it was completely gone.  If that doesn't say that the dip was good then I don't know what else would.  I served it with tortilla chips and wheat crackers but you could also serve it with veggies like celery or carrots but it really just depends on what you like.  I would definitely suggest making this for a party but give yourself enough time to actually make it haha.  Next time, I'll allot enough time to cook it all at once but I definitely want to try it again!

Sunday, November 20, 2011

Boy These Are Addicting

I know it's been awhile since my last post but I'm still alive I promise haha.  These last couple weeks have been CRAZY busy with school and football and friends and basically life so I haven't had time to sit down and blog.  I shouldn't be surprised since the semester is finishing up and we're getting into the holiday season.  Anyway, I have had time to be on Pinterest however haha.  We were going to have people over one night so I thought this would be the perfect opportunity to make something that I had stumbled upon on Pinterest.  The problem with finding recipes online is that they always make wayyy to much for just me so whenever I have an opportunity like this to make something for a large amount of people, I take it.  So while browsing on the site, I stumbled upon these super easy and extremely delicious cake batter blondies.  They caught by eye because they looked very appealing and tasty and who doesn't like anything with cake batter in it right?  I was sold as soon as I saw them and boy it was a great decision.  

Shockingly this time I actually followed the recipe that was posted on the blog.  But I'll re-write it again just to make it easier on y'all so here's what I used for this tasty little treat...

1 box of yellow cake mix (any brand is fine, it's just what you prefer)
1/4 cup canola oil
1 egg
1/2 cup non-fat milk (again you can use whatever percentage of milk that you prefer)
1/4 cup rainbow sprinkles
1/2 cup white chocolate chips

On the blog that I got the recipe from she said that the chocolate chips are optional but since y'all know me and how much I love chocolate chips, in my opinion they are mandatory haha.  So after going to the grocery store and gathering all the necessary ingredients, I started the baking process by preheating the oven to the standard 350 degrees.  While the oven was heating up, I mixed the first 4 ingredients in a big bowl.  On her post, she says to add the milk slowly in order to keep the batter as dense as possible but I honestly just poured it all in and it still worked just as well.  I then added the best part to the batter...the sprinkles and chocolate chips...

 Chocolate chips yummyyyy

Mixed batter

I mixed them all together and it was an arm workout.  This batter was DENSE but o so delicious.  I was hard not to eat it raw honestly but I did get a little bit of it after I added it to a 9x9 ceramic baking dish because who doesn't like the bowl and spoon at least a little bit before they wash it?  I then threw them in the oven...

Cake batter before it hit the oven

Once in the oven, the blondies baked for about 25 minutes because she said to cut the original time of 30 down since she used a casserole dish.  This time was perfect because the edges were just brown enough but the center was perfectly gooey.  I let them cool for about 30 minutes before cutting them and having a little sample for myself haha.  They were so delicious and o so addicting!  They were a HUGE hit when everyone came over and I heard nothing but good remarks.  It's always so nice to have people compliment your baking because then you know that you're doing something right haha.  I would definitely recommend this for anyone to make because it's really easy and doesn't require a lot of ingredients, which translates perfectly for a college treat.  This wasn't the only thing I made for that night though but if you want to know what else I made, you'll have to read my next post...

Finished product