Thanksgiving means food and food means I bake or cook something plain and simple. If you read my last post, then you already understand how much I love Thanksgiving but if you didn't go read it! I made a side dish of brussels sprouts that were a hit but I had to bake something too because baking is what I truly love to do. I searched for the perfect dessert to make and found it again in Cooking Light. I decided upon a Triple Chocolate Cake because my mom was making an apple cake that she had gotten the recipe for from one of her friends. This cake was kind of labor intensive but worth it in the end. Here is what we used because my mom helped me out making it again...
Cake:
1 cup boiling water
1/2 cup + 1 tablespoon cocoa, divided
2 ounces bittersweet chocolate, finely chopped
cooking spray
1 1/2 cups granulated sugar
6 tablespoons unsalted butter, softened
1 teaspoon vanilla extract
3 large egg white
1/2 cups reduced-fat sour cream
2 cups cake flour
1 1/2 teaspoons baking powder
1/2 teaspoon baking soda
1/2 teaspoon salt
Filling:
1/3 cup skim milk
1 tablespoon granulated sugar
1 tablespoon cornstarch
Dash of salt
4 ounces milk chocolate chips
3/4 cup light whipped topping, thawed
Glaze:
1/2 cup powdered sugar
1/4 cup cocoa
3 tablespoons fat-free milk
2 teaspoons butter
1 ounce bittersweet chocolate, finely chopped
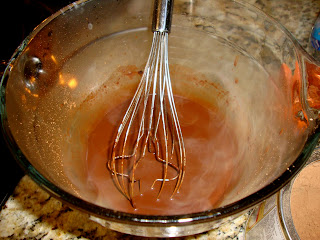
See now you understand why it was a little labor intensive haha. We made the cakes and the filling the night before because we just went to my grandparents for the day and we knew we would not have the kitchen space to bake them up there. First thing we did for the cakes was boil the water. I chopped the bittersweet chocolate while the water was boiling and once boiled I added the water, cocoa, and chocolate together in a glass mixing bowl. I used a whisk to stir them to make sure that there were no chunks in the mixture. We then had to let it cool to room temperature before we could use it.
Hot off the stove...notice the steam
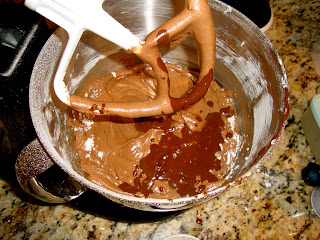
While the chocolate mixture was cooling, I then started on the other parts of the cake recipe. First, I coated 2 (8-inch) cake pans with cooking spray, cut out wax paper to place in the pans, placed the wax paper in the pans, and then sprayed the pans with cooking spray again. In an electric mixer, I combined the sugar, butter, and vanilla. I beat this mixture on medium speed for about a minute. The egg whites were then added one at a time and I beat the mixture after each egg white addition, Sour cream was the next addition and then that was beat for about 2 minutes. Meanwhile in another bowl, I combined the flour, baking powder, baking soda, and salt with a whisk. Once the chocolate mixture was cooled to room temperature, I added the flour mixture and chocolate mixture alternately to the sugar mixture. I started and ended with the flour mixture and beat it all together until combined.
After adding the chocolate mixture
After everything was fully combined together, I poured the batter into the 2 cake pans evenly. I then put them in the oven for 30 minutes at 350 degrees. When the timer went off for 30 minutes, we took them out and checked to see if they were done but after the toothpick check, they appeared they were not. So we put them back in the oven for 5 more minutes. This sadly was too long because this is what made our cakes a little dry but I'll get to that later.
Pre-baking
Post-baking
I was planning on making the filling the next morning since it didn't look too labor intensive so I left to go bowling with my friends. My mom later decided that it would be better to make the filling that night so she went ahead and made it with my permission. To make the filling me added the milk and next 3 ingredients in a saucepan over medium-low heat. She then brought it to a boil while stirring it constantly. Cook until think and then remove from the heat. Then add the milk chocolate in and stir until smooth. Pour it into a bowl and then cover and chill. Here's what it looked like before I added the whipped topping to it the next day...
Adding the whipped topping in
The next day after I finished the filling, I began to assemble the cake. I put one cake layer on the bottom of the cake carrier and then proceeded to add the filling. I smoothed it as evenly as I could over the bottom cake and then plopped the other cake layer on top. This made the filling kind of flow over the bottom layer so we just decided to spread it around the bottom layer.
Cakes with the filling
To make the glaze, I combined the powdered sugar and remaining ingredients in a saucepan over low heat. I stirred frequently until fully combined. I then poured it over the top of the cake as best as I could. It didn't turn out as pretty as the picture in the magazine but it tasted good so that's all that matter right?
Finished product
We then put the cake in the fridge for a couple hours to let it set. When dessert time rolled around, we took it out and cut into it. Sadly it was not as good as I hoped but that's because we cooked the cakes too long. The cakes were a little dry but the filling and glaze were delicious. It was not the best thing I've made and I will be the first to admit it but everyone seemed to like it. So if you make this, cook the cakes according to the cook time. It would have been great if they weren't dry but sadly that was not the case this time. I combined mine with some pumpkin pie and that was delicious because it didn't make it so dry. I mean I would definitely recommend making this and I probably will try to make it again. I may add chocolate chips to the cakes next time and make more filling to sort of ice the whole cake as well. We definitely enjoyed our thanksgiving so I hope that y'all all did too!


No comments:
Post a Comment