Tuesday, November 22, 2011

Geez it's all Gone?

In case you didn't read my previous post, I have been busy, busy, busy which is why I haven't been posting recently.  I'm alive and well I promise just busy with life.  I have still been cooking and baking though so now I'm finally catching up and telling y'all about what I've been up to.  In my previous post, I talked about how I made cake batter blondies because we were going to have a bunch of people over.  I didn't want to stop there though because when entertaining you have to make something savory and sweet.  I have always wanted to make spinach and artichoke dip so this was the perfect opportunity to do it.  I got the recipe from my recipes again because when all else fails, I go there to find a recipe.  The recipe is actually from Cooking Light which is also my go-to for recipes.  This recipe was very easy, delicious, and much healthier for you than regular spinach and artichoke dip and those are my 3 favorite descriptions of food when it comes to cooking an baking.  Here's what went into my spinach and artichoke dip...

2 cups (8 ounces) shredded part-skim mozzarella cheese
1/2 cup fat-free cour cream
1/4 cup (1 ounce) grated Parmesan cheese (original calls for fresh but I'm in college and on a budget to I used shake Parmesan cheese)
1/4 tsp black pepper
1/2 tbsp garlic
1 (12-ounce) can artichoke hearts, drained and chopped
1 (8 ounce) block 1/3 less-fat cream cheese
1 (8 ounce) bloack fat-free cream cheese
1 (10 ounce) package of frozen chopped spinach, thawed, drained, and squeezed dry

Here's something that I've learned these past couple months from cooking and just life in general...things always take longer than you expect.  With that being said, I thought that I would have plenty of time to make this dip before everyone came over that night but sadly that was not the case.  I had to leave to go to a meeting at like 5:30ish that night and I got home around 5:00 to start the dip...I was working like a mad woman to finish this thing.  I had just bought the cream cheese at thr grocery store so it wasn't exactly softened but you got to work with what you're given when on a time crunch.  I made a total mess of the kitchen but the end product was worth it and don't worry I finished it in time thank goodness!

First thing I did when I rushed in the door was preheat the oven to 350 degrees.  While the oven was heating up, I took out the frozen spinach from the package and ran it under water to help it thaw...it was not thawing very quickly.  So what do you do in a time when you literally have no time?  Throw it in the microwave and hope it doesn't ruin it.  I heated the spinach for about a minute and then I put it aside in another bowl.  I then tried to drain it as best as I could but I didn't have to to sit there for like 15 minutes draining it so I just did it as much as I thought it needed. 

 Doesn't that look appetizing haha

 I then drained and rinsed the artichoke hearts so that I could begin to chop them up.  I chopped the whole can up as quickly as possible and tried to chop them in as small of pieces as possible.  Here's my results...  


After frantically chopping the artichoke hearts, I then added 1 1/2 cups of mozzarella, the sour cream, 2 tablespoons of Parmesan, and the next 6 ingredients to the artichoke hearts and spinach in a large bowl.  I then stirred them all together until they were well blended.  
All mixed together

Once everything was evenly mixed together, I scooped the dip into a 1 1/2-quart baking dish.  I sprinkled the remaining 1/2 cup mozzarella and 2 more tablespoons of Parmesan to the dip and then put it in the oven.

Mmmm cheese

At this point, I had about 15 minutes until I had to leave.  I let it cook for 15 minutes and then turned off the oven and rushed out the door.  Once I came back from my meeting, I turned the oven back on while the dish was still in it.  I cooked it for about another 20 minutes and then took it out to cool and serve.  Once I put it out, everyone could not stop eating it and let me tell you I know why.  I was SO good!  I love spinach and artichoke dip and it tasted the same to me as any other I've tried but it is so much better for you.  Everyone loved it and by the time the last person left our house, it was completely gone.  If that doesn't say that the dip was good then I don't know what else would.  I served it with tortilla chips and wheat crackers but you could also serve it with veggies like celery or carrots but it really just depends on what you like.  I would definitely suggest making this for a party but give yourself enough time to actually make it haha.  Next time, I'll allot enough time to cook it all at once but I definitely want to try it again!

Sunday, November 20, 2011

Boy These Are Addicting

I know it's been awhile since my last post but I'm still alive I promise haha.  These last couple weeks have been CRAZY busy with school and football and friends and basically life so I haven't had time to sit down and blog.  I shouldn't be surprised since the semester is finishing up and we're getting into the holiday season.  Anyway, I have had time to be on Pinterest however haha.  We were going to have people over one night so I thought this would be the perfect opportunity to make something that I had stumbled upon on Pinterest.  The problem with finding recipes online is that they always make wayyy to much for just me so whenever I have an opportunity like this to make something for a large amount of people, I take it.  So while browsing on the site, I stumbled upon these super easy and extremely delicious cake batter blondies.  They caught by eye because they looked very appealing and tasty and who doesn't like anything with cake batter in it right?  I was sold as soon as I saw them and boy it was a great decision.  

Shockingly this time I actually followed the recipe that was posted on the blog.  But I'll re-write it again just to make it easier on y'all so here's what I used for this tasty little treat...

1 box of yellow cake mix (any brand is fine, it's just what you prefer)
1/4 cup canola oil
1 egg
1/2 cup non-fat milk (again you can use whatever percentage of milk that you prefer)
1/4 cup rainbow sprinkles
1/2 cup white chocolate chips

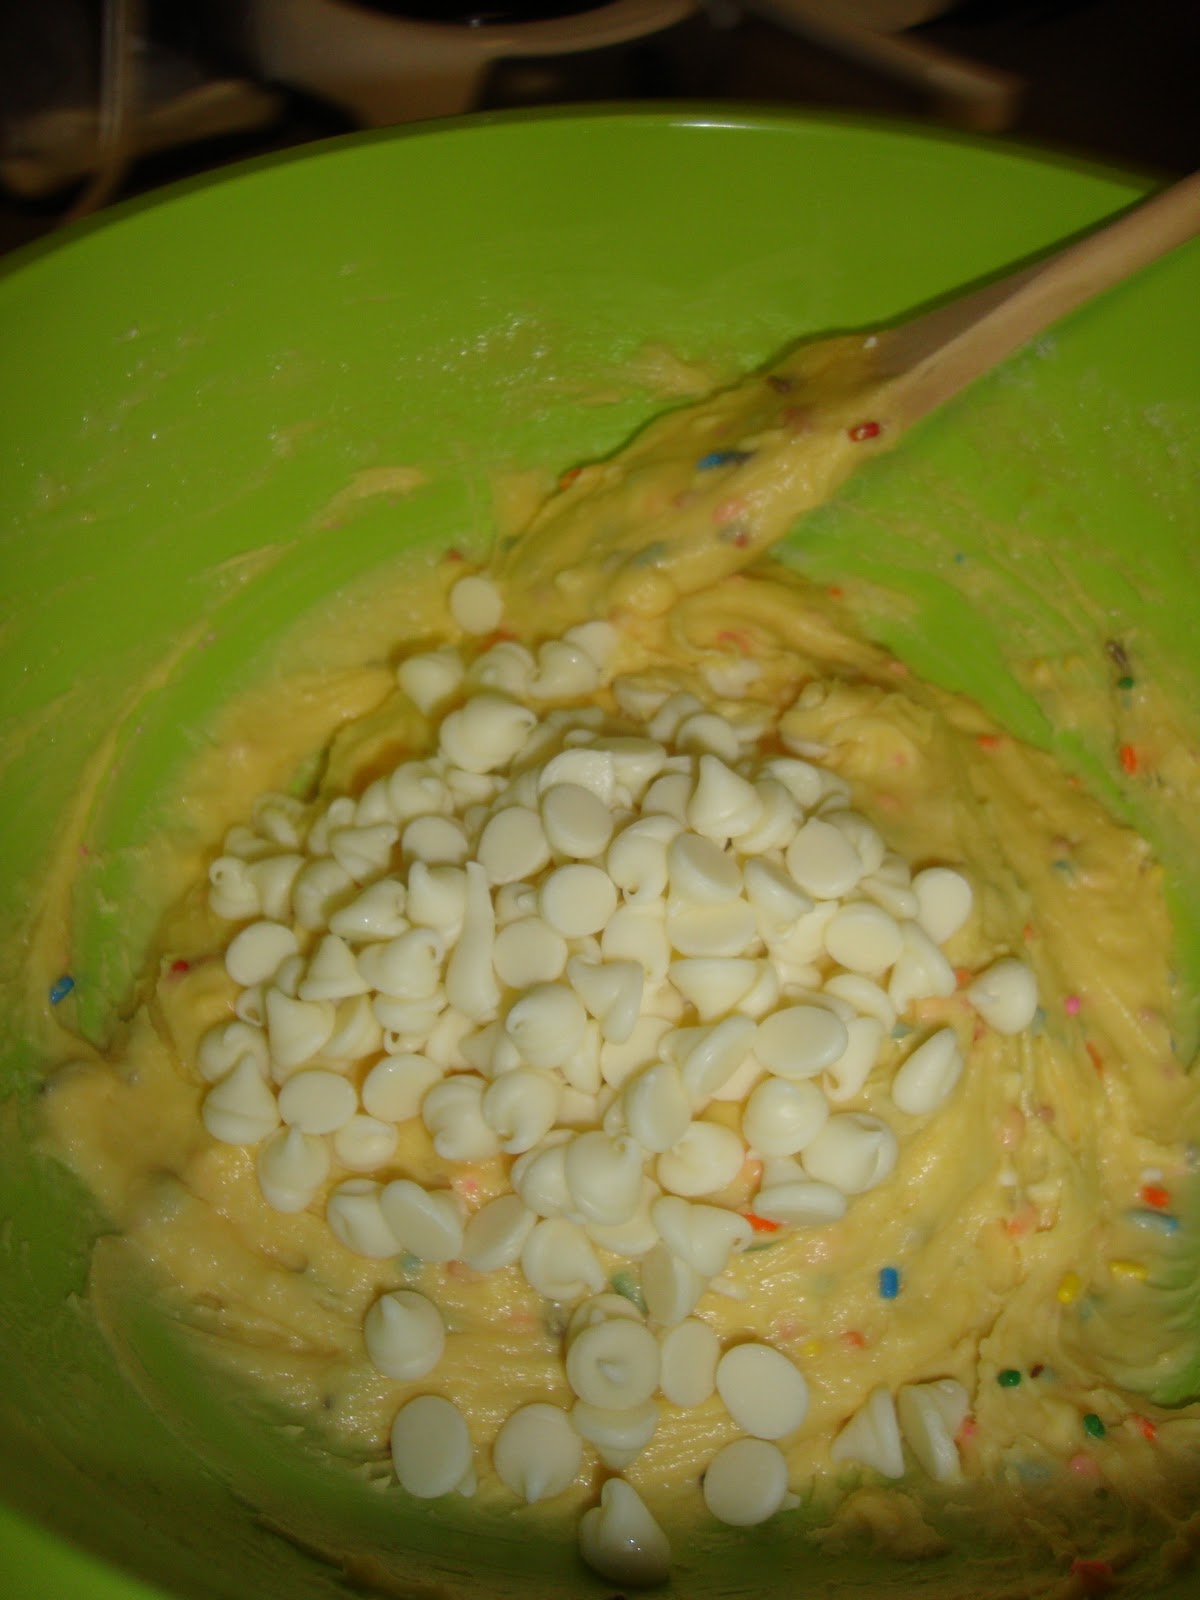
On the blog that I got the recipe from she said that the chocolate chips are optional but since y'all know me and how much I love chocolate chips, in my opinion they are mandatory haha.  So after going to the grocery store and gathering all the necessary ingredients, I started the baking process by preheating the oven to the standard 350 degrees.  While the oven was heating up, I mixed the first 4 ingredients in a big bowl.  On her post, she says to add the milk slowly in order to keep the batter as dense as possible but I honestly just poured it all in and it still worked just as well.  I then added the best part to the batter...the sprinkles and chocolate chips...

 Chocolate chips yummyyyy

Mixed batter

I mixed them all together and it was an arm workout.  This batter was DENSE but o so delicious.  I was hard not to eat it raw honestly but I did get a little bit of it after I added it to a 9x9 ceramic baking dish because who doesn't like the bowl and spoon at least a little bit before they wash it?  I then threw them in the oven...

Cake batter before it hit the oven

Once in the oven, the blondies baked for about 25 minutes because she said to cut the original time of 30 down since she used a casserole dish.  This time was perfect because the edges were just brown enough but the center was perfectly gooey.  I let them cool for about 30 minutes before cutting them and having a little sample for myself haha.  They were so delicious and o so addicting!  They were a HUGE hit when everyone came over and I heard nothing but good remarks.  It's always so nice to have people compliment your baking because then you know that you're doing something right haha.  I would definitely recommend this for anyone to make because it's really easy and doesn't require a lot of ingredients, which translates perfectly for a college treat.  This wasn't the only thing I made for that night though but if you want to know what else I made, you'll have to read my next post...

Finished product

Wednesday, November 9, 2011

Mmm Pumpkin Seeds Are So Tasty

Halloween and autumn bring about so many fun traditions and carving pumpkins is one of those.  Since Halloween is tomorrow, we carved pumpkins last week in honor of it.  I've never carved a pumpkin on my own however so this was quite and interesting sight.  All of my friends that I carved them with hadn't either so we were all kinda of the blind leading the blind haha.  We figured it out though so it was not a problem at all.  I never knew how gross the inside of pumpkins were though until we carved them the other day.  They were very slimy and gross and I had to use my hands because it was the best way to get all the goo and the pumpkins seeds out of course, which was kind of the big reason why I wanted to carve the pumpkin in the first place.  Last year my roommate and one fo my best friends carved a pumpkin for me for my birthday and roasted the seeds after and that's how I discovered I liked them so much.  So because of this discovery, I wanted to make my own this year!  So I scrapped them all out of the pumpkin and put them in a bowl to bring back to clean.

Slimy seeds ewww

Once I got them home, I rinsed them out in the sink in a strainer.  I had gotten most of the pumpkin goo off but this helped to get all the remaining stuff off.  I then proceeded to dry them as best as I could and spread them out all over a cookie sheet so that they would roast evenly.  In order to find the perfect seasoning for them, I did what any other person would do...I googled roasted pumpkin seeds and found this recipe.  Instead of using the Old Bay though, I used Jane's Krazy Mixed-Up in Original Mixed-Up Salt because my roommate had it and it looked really good!  I can't tell you the exact measurements for everything but I was lazy and didn't measure any of them...sorry but I'm in college so being lazy is just a given sometimes haha.  Anyway, so I sprinkled the salt all over the pumpkin seeds on the cookie sheet and put them in the oven.

Before putting them into the oven, I preheated it (obviously) to 300F and coated the cookie sheet with cooking spray.  I then baked the seeds in the oven for 30 minutes.  I took them out to stir them at 15 minutes and to have a little taste.  After 30 minutes, I took them out and let them cool for a little bit before a full on tasting.  Well worth the wait let me tell you!  They were SO good!  Such a good and different way to fulfill that salty craving and they're healthy!  The roommates all enjoyed them too.  I definitely want to make more pumpkin seeds because they are so good for you so hopefully I will.  I think I'll use some different seasonings such as garlic or Parmesan cheese next time though just to add some variety.  Happy Fall!
Finished product NOMMMM

Tuesday, October 25, 2011

Hmm what to make, what to make?

This week is another slow week for me thankfully so I had the time to make something yummy again for dinner.  Tonight I wanted something quick, easy, and used things that I already had.  Like I've said before, I had bought way too much food at the grocery store so I've been trying to use it all up before I go and buy more.  So I stumbled upon a recipe that fit all the criteria on, what else, My Recipes.  This recipe was altered though of course because when do I ever follow the recipe perfectly.  The original recipe that gave me inspiration was for a vegetable couscous salad but I had some ground turkey that I had frozen so I wanted to add that to the mix as well.  Here is what I ended up using for my Turkey and Vegetable Couscous salad...

1/3 package of ground turkey
1 tsp garlic
1 tsp italian seasoning
1/2 tsp basil
1/4 cup couscous
1/2 cup water
1/4 cup red pepper, chopped
1/4 cup white onion, chopped
1/4 cup cherry tomatoes, sliced
1/2 cup zucchini and squash, sliced
1/3 cup water
1/4 cup balsamic vinegar
1 tbsp extra virgin olive oil

First thing I did was defrost the ground turkey because I had frozen it.  I put it in the fridge all day to help defrost it over the course of the day but it wasn't totally defrosted when I took it out.  I put it in a microwave safe dish in the microwave for 2 minutes on timed defrost and that worked perfectly.  I then added the garlic, italian seasoning, and basil to the ground turkey and mixed it through with my hands.  I then put the turkey in a pan with cooking oil on the stover over medium high heat.  Here's a peak of it cooking...

Doesn't look very appetizing I know

While the turkey was cooking, I brought 1/2 cup water to a boil to cook the couscous in.  I then added the couscous and reduced the heat to low.  Also while all this was going on, I was broiling the zucchini and squash in the oven on high.  I have to admit, I kinda forgot about them so they got a little charred but they were still good to me because I like things a little crispy haha.  Anyway, the turkey was finally done after about 10 minutes so I took it off and put it on a paper towel on a plate to drain all the juices off it.  I chopped up the red bell pepper, onion, and cherry tomatoes and set them aside to add later.  Here are all the ingredients while waiting for the couscous to finish...


Y'all are going to think I'm ridiculous but again while all this was happening, I added the water, balsamic vinegar, and extra-virgin olive oil to a bowl and whisked them all together.  Once the couscous was finally finished cooking, I added it to the bowl with the dressing.  All the veggies and 1/2 cup of the cooked turkey were then added to the bowl and mixed all together.  I'll probably use the rest of the cooked turkey in something else like a salad or wrap for lunch but I just didn't need it all for the couscous.

Now it looks good!

I then added around 1 cup of the couscous salad to about 1 cup of chopped romaine lettuce to make it a salad.  I mixed it all together, added some pepper, and then sat down and finally ate my meal.  It was really good!  I'm glad I added it to the lettuce because that soaked up some of the dressing and added a little crunch.  I did use the full amount of dressing as called for in the original My Recipes recipe but it was wayyyy too much.  I had to pour some of it out because originally I was going to save some of it but I honestly forgot to haha.  You don't have to add the romaine lettuce by any means because I think it would be good by itself but I had it kicking around so I figured why not.  I would definitely recommend making this recipe because it's really quick and easy which are 2 words that are essential for a college cook.  I do want to make the vegetable couscous recipe for some lunches sometime so hopefully I'll be able to make it soon!  O and I did have leftovers but not nearly as much as I put in the salad so may use 3/4 cup of the couscous salad instead of a full cup if you want even leftovers!

Final product :)

Monday, October 24, 2011

Well That Didn't Make a Mess or Anything

This weekend is another one of my friends birthdays and y'all know what that means...baking!  I tried to ask her what she wanted but couldn't get a hold of her so I started doing some research for something yummy.  I probably spent a good 2 hours on Pinterest, which I would recommend to anyone to get one but I have to warn you it will take over you life...no really it will.  Anyway, I got kind of overwhelmed with so many choices so I tried to narrow it down.  I finally narrowed it down to 3 but for some reason I have been wanting to make a red velvet something so I decided on red velvet cake balls.  I've never made cake balls either so I can now officially check that off my baking list.  I found the recipe from google off of a website called Bakerella but I tweaked it a little bit as always.  Here is the recipe that I used...

1 box red velvet cake mix
1 batch of low-fat cream cheese frosting
1 package of white chocolate bark (can either use regular or white)
Wax paper

First thing that I did was bake the cake according the the directions on the box.  I used a 13 x 9 pan because that's what the Bakerella recipe called for.  The batter looked like straight blood though.  Take a look...

Ew.

The batter actually stained our sink red too but I washed it out thankfully.  I cooked the cake for about 35 minutes and took it out to cool.  Meanwhile, I made the cream cheese frosting which called for...

1 8 oz. block reduced-fat cream cheese
1 cup powdered sugar
1 tsp. vanilla

I added all the ingredients for the icing in a bowl and blended them with our hand blender until fully combined.  Once the cake finally cooled, I cut it into smaller sections, crumbled it up, and added it to the bowl with the frosting because that's the only big bowl we have.  This is where it got SUPER messy.  I was mixing the cake and frosting by hand because I figured that would be the easiest thing to do.  My hands have never been so messy and red in my life.  I mixed it all together thoroughly and started to form them into small balls.  This was a bit difficult and also very messy because I'm not sure if there was enough cream cheese frosting or not.  Some of the cake would like flake off so I just did the best I could to make them stick together and I just went with it.  I put the balls in 2 plastic containers and put them in the fridge overnight to cool.  You don't have to leave them in the fridge overnight but it was late and I knew that I wouldn't have time to do the chocolate coating so I just figured leave them there all night.  Here's what they looked like pre-chocolate coating...


I honestly can't tell y'all how many it made because it really depends on how big you make them.  I would say that it made over 30 at least but again it just depends because some were bigger than others.  Anyway, the next day I added the final touch...the chocolate coating.  I broke the package of chocolate bark in half and placed half of it in a microwave safe bowl.  I microwaved it for about a minute but it was nearly melted enough so I put it back in the microwave for another 30 seconds.  It was melting better but still not fully melted so I microwaved it again for two 15 second intervals and that did the trick.  I had to work fast though once the chocolate was melted because once the chocolate gets cool it gets very hard.

The recipe I went off of said to use a spoon to dip it in and out of the chocolate but I honestly ended up using my hands most of the time.  Honestly there is no good way to make them look pretty and covered in chocolate but I figured as long as they taste good, who cares?  Once I ran out of melted chocolate, I repeated the microwaving process again and continued to cover the other cake balls in chocolate.  Sadly, I ran out of chocolate though.  I'd say about 2/3 of the cake balls got the chocolate coating so next time, I will buy another package of the chocolate.  I tried to be inventive and melt some remaining white chocolate chips that I had on hand but it was kind of a fail in that they didn't melt very easily or stick to the cake balls very well...o well live and learn I guess haha.  Now, time to have a taste and they were great!  The birthday girl, my roommates, and my family all loved them so this is definitely a crowd pleasing recipe!  It is a little labor intensive I must say but if you're willing to put in the time and effort, they are definitely well worth it!

Finished product YUM.

Thursday, October 20, 2011

Best Thing I've Made So Far Hands Down

Today was another really cold day (and blustery too might I add) so I wanted to make something that was warm again.  I had a lot of fresh food on hand so I wanted to cook something that used it before it went bad.  I also had opened a can of tomato sauce for the chili so I wanted to use that up as well before it went bad.  And what does tomato sauce always go in...a pasta or italian dish.  The original dish that I wanted to make was called Baked Eggplant with Mushroom-and-Tomato Sauce which hopefully someday I will make but sadly it didn't happen tonight.  I was planning on using zucchini instead of eggplant because I like it better and it was cheaper so I started followed the recipe as it read.  Lesson that I learned tonight...I always read the ENTIRE recipe.  As I was broiling the zucchini, I looked down further and saw that this thing was supposed to bake for an hour.  Now normally I would have been fine with this but considering that I was starving long before I started cooking, there was no way I could wait an hour.

So thinking quickly on my feet, I decided to make a pasta...best decision I have made.  This was honestly the best thing that I've made so far in my opinion.  I don't know why I liked it so much but I was so incredibly satisfied and proud eating my pasta when I was done.  I did kind of a hybrid recipe with the help of my mom so here are the list of ingredients that I used...

1 large zucchini, sliced
cooking spray
1 cup white mushrooms
1 + 1/2 cup fresh spinach
1/2 cup white onion, chopped
1 medium Roma tomato
1/2 cup cooked Rotini pasta
1/2 cup tomato sauce
1 tsp canned pesto
1 tsp Italian seasoning
1/2 tsp garlic powder
1/4 tsp salt

So since I was originally following the other recipe at first, I set my broiler to high and placed the sliced zucchini on a baking sheet coated with cooking spray.  I roasted the zucchini for about 4 minutes on each side.  While the zucchini was roasting, I added the mushrooms, onions, Italian seasoning, salt, and garlic to a saute pan over medium high heat.  I was also cooking the spinach on another pan over medium high heat as well.  The mushroom mixture cooked for about 10 minutes and then I decided to make the pasta.  So since I needed to make the sauce, I added the tomato sauce to the pan and mixed them all together.  Also while they were blending flavors together, I began to boil water for the rotini to cook.  Once it boiled (took about 10 minutes), I added the pasta and cooked it for about 9.

Sauce pre-pasta

Now back to the sauce.  I added the zucchini and spinach to the sauce at this point as well as the pesto.  I think the pesto was what made it so good even though it was only a little quantity.  I'm definitely going to try making sauces that mix marinara and pesto from now one but anyway.  I kept stirring the sauce while the pasta was cooking but the liquid was starting to evaporate so I took the pan off the heat for a little bit until about the last minute of the past cooking.  When the pasta was done, I drained it in the sink and added it to the pan.  I mixed it all together and added about 2 handfuls of part-skim mozzarella cheese to the pan as well.  You don't have to do this but a little cheese can't hurt right?  The cheese melted into the dish and it was finally time to eat...like an hour later.

With the pasta

Well worth all the time and effort though!  It was amazing and I was really happy with myself.  I definitely enjoyed eating it...the cleanup afterward not so much though haha.  After cooking 4 nights this week, I've come to realize how much time and effort really goes into cooking a good meal.  It's a lot and it's draining.  I love cooking but this week has kinda taken it out of me which is kinda sad considering that I haven't made things that are super intense.  I think it's the cleaning that burns me out the most though honestly haha.  I'll have to get used to that though sadly.  Well I would 100% say make this dish because it's amazing and I loved it and I think y'all would too!

All my hard work in one bowl

Wednesday, October 19, 2011

Cold Weather = Chili

The weather decided to change its mind on us again today but this time it decided that it wanted to monsoon and get super cold.  I'm all about the fall weather but when you go from like 80 to 50 the next day I'm not so much of a fan.  But since it was cold outside today it was the perfect weather for what I've been wanting to make all week...turkey chili!  I was actually happy to see it was colder because chili is the best on a cold night.  So since the weather permitted I made my turkey chili tonight.  I didn't really have a recipe to go off because I was inspired by the turkey chili that my mom makes because it is seriously one of my favorite meals that she cooks.  I asked her what she put in it and altered it a little bit to my liking because my parents have a little bit different taste pallet than I do.  

I had already cooked the ground turkey a week ago and froze it.  At the time, I wasn't sure what I was going to be using it for so I wanted to season it to where I could use it for multiple things.  Originally I thought I could use it for ziti or for chili.  I had stumbled across another really good recipe for ground chicken in lettuce wraps so I figured I could use the same seasonings for ground turkey.  Here is the recipe for the chicken lettuce cups that I based my seasonings off of.  This is the actual recipe that I used however...

1/3 package ground turkey 
1/4 tsp ground black pepper
1/4 tsp garlic
1/3 tsp parsley flakes
1/4 tsp oregano

I added the ground turkey and spices in a bowl and mixed then together.  I then put the turkey in a pan on the stove over medium high heat.  I cooked it for about 10-15 minutes just to make sure that it was thoroughly cooked.  Here's the end result...doesn't look to appetizing but it was great in my chili!


Ok now back to the chili.  Like I said, I didn't really have a recipe to follow because I just went off what my mom has made so here is what I ended up using in my turkey chili...


1 cup canned corn drained
1 cup black beans, drained
1 cup frozen pepper blend
1/3 pack ground turkey, previously cooked
1 15 oz can white kidney beans, drained
1 can diced tomatoes no salt added
2 green onions, chopped
¼ cup tomato sauce
1 tsp cumin
1 tsp cilantro
1 ½ tsp garlic
½ tsp black pepper
½ tsp salt

First thing I did was thaw the frozen pepper blend in a microwave safe dish in the microwave for 1 minute.  After thawing them, I added them to a pan over medium high heat on the stove and began to cook them.  While the peppers were cooking, I added the corn, black beans, white beans, diced tomatoes, and frozen ground turkey to a pot.  I turned the burner to medium high heat and stirred them altogether so that their flavors could begin to mix together.  

Pot pre-mixing

There didn't look like there was enough liquid in the pan so I added the tomato sauce to help it have more liquid.  The peppers finished cooking after about 5-7 minutes so I just added them straight to the pot when they were done.  I chopped up the green onions and added those to the pot as well.  I then began to add the spices which was quite interesting and scary for me.  I'm not really a spicy person so I wasn't sure how much of each spice would be too much.  I figured to start slow and I could always add more after if I needed it.  I added more garlic than the rest of the spices because I love garlic and I felt like it needed it.  I brought the chili to a boil and then turned it down to low and covered it.  I let it simmer for about 20 minutes so that all the different flavors could mesh together.  I did to taste testing here and there and added a little more pepper and garlic but it's really up to you as to how much and which spices you use.  My spice ratio actually turned out perfectly for me so I was happy!  I cooked some fresh spinach for a little side dish and then finally filled my bowl with my chili and I was ready to eat.  It was SO good and perfect for today.  

Post-mixing

I was happy with the way it tasted because it wasn't too spicy but it did have a little kick.  I may try to add some different spices next time and maybe add more peppers or use ground chicken but overall for my first try I was definitely pleased.  So if its a cold night and you want something yummy and easy to warm you up, chili is definitely the way to go!

Final product...YUM